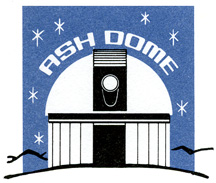
Click on any image for a full-size picture which will display in a popup window.
|
The telescope concrete pier base is poured before the observatory construction begins. Stakes and string lines mark the walls of the observatory.
|
Measurements are done from the center of the pier to set the string lines for the side and end walls. This will also identify where the concrete deck bases will go. The
concrete deck bases are sunk into the ground so that the 4"x4" post that is placed in the base will be at least 1" above ground level. The bases are leveled, front to back and side to side.
|
|
|
Determining the height of the 4"x4" posts that sit in the concrete bases and support the deck. Scrape 2"x4" are clamped to a floor joist and will sit in the
outside concrete bases. The proper joist height is determined by placing a level from the pier base to the top of the joist. The joist is then leveled between
the outside supports. Measurements are then taken between the concrete base and the bottom of the joist. Finally, 1.5" is subtracted from the measurements to account for the thickness of the floor.
|
Once support posts are cut for one side, a side beam (doubled joists) is palced on top. The support posts for the other side are determined by creating
the floor frame box and leveling between the beams. Once all posts are in place, level is checked again and the frame is squared by measuring diagonally between the corners. Cross bracing is then nailed to keep the frame square.
|
|
|
|
|
When using the concrete base / support post deck style, additional concrete piers should be added to insure that the observatory does not lift off the base
under high winds. At least two holes, 1' below the frost line should be dug under the floor beams. Rebar are then driven into the bottom of the holes at angles. The
holes are then filled with concrete and steel straps are nailed into the beams and rest 5"-6" into the concrete.
|
|
|
|
|
Floor joists are hung 16" on center between the beams.
|
|
|
|
A sub-floor of 1/2" OSB is then nailed onto the joists.
|
The hard part is cutting out for the telescope pier base.
|
|
|
|
|
|
After the sub-floor is complete, the finished floor of 1"x8" pine boards is nailed down. We start with the straightest board to insure the floor gets laid out properly.
|
|
|
Pine boards are often not perfectly straight, so bar clamps are used to pull the boards into place. We do measurements from the first board, to make sure the boards are properly spaced.
|
|
Next the wall are built and nailed into place. You can either build all the walls first or build & nail as you go. The floor makes a great place to build the walls.
|
|
|
|
|
|
|
|
|
|
|
|
Once all the walls are in place, use a level to plumb the wall and nail long boards diagonally across the studs to keep the walls plumb.
|
After the walls are in place, 4x4's are clamped and then screwed to the tops of the sidewalls.
|
The roof support system is put into place next. This is definately a two person job. We first determine where the support pads will go.
Then, a support jack, support post and roof rail are added to each side of the observatory. Above, the crew is determining the length of the support post.
|
|
After the roof rails are in place, a cross beam and support diagonals are added. The diagonals, once lag bolted into place,
give the roof support system strength and rigidity.
|
|
|
|
|
|
Once the roof support system is in place, the garage door track is screwed to the sides of the roof rails. Then the roof runners,
which will from the base of the roof and allow it to roll, are slide onto the track.
|
|
After the roof base is complete, the ridge beam and roof trusses are added.
|
|
Once all the roof trusses are in place, screw blocks are added for the metal roofing. These blocks keep the sharp screw points
from sticking into the observatory
|
|
The roof framing is complete. Time to have some fun and set the pier.
|
|
Coming to the end of day 1. Sheathing is being nailed to the sides and roof.
|
|
|
|
The start of day 2. The roof vents have been cut and screwed into place.
|
Measuring for the roof siding. The roof siding goes on before the roofing is added.
|
The roof tar paper has been stapled down and the metal roofing is being screwed into place. Holes for the roof screws are
pre-drilled, making the roof panels go on quick and easy. Lots of measuring is done on the first panel to make sure it is properly
aligned and has the right overhang. After the first panel is set, the remaining panels quickly lock into the proper alignment.
|
|
|
The siding goes up quickly. The last roof panel will need to be cut to the proper width before being set.
|
|
|
|
|
|
Finishing the siding and caulking all the gap to give the observatory a weather tight seal.
|
|
Adding the roof ridge cap.
|
All done with construction.
|
|
|
|
|
|
|
|
|
Final painting and finishing is complete.
|
|